 Did you know March is National Craft Month? Now before you scoff at the mention of arts and crafts, a term you may think you have long out-grown, reflect for a moment on the enjoyment you derived from art projects during your childhood. I’m not talking about the required assignments from art class that left you (well, maybe that was just me, because of my lack of artistic talent!) disappointed because of a poor grade. I’m talking about the popsicle stick log cabins and handprint turkeys that you worked on at home with friends and family. It would be impossible for me to ever relive the carefree hours I spent sitting at my kitchen table with watercolors and construction paper, but just writing this blog post is enough to make me add “coloring” to my list of things to do this weekend.
I think encouraging your business to participate in National Craft Month is a great way to help staff relieve stress and unleash their creativity. You could even combine arts and crafts with a favorite philanthropy, such as volunteering at the children’s ward of a local hospital. Whether you decide to drop off handmade cards or artwork to the kids or spend time creating masterpieces with them, the thoughtful sentiment and bright, happy colors of the pieces are sure to bring smiles. And although the driving force behind your volunteer work shouldn’t be the positive publicity, you could always leave the beneficiary’s of your kindness with art-related promotional products like promotional markers so that whenever they spend time coloring and drawing, the imprinted messages will remind them of their special relationship with your organization and the fun times they have shared with representatives of your brand.
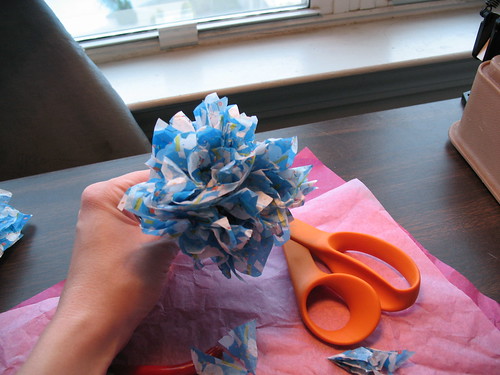
In college, one of the clubs I was a part of used to make tissue paper flowers that we hand-delivered to a local children’s hospital:
Materials:
Colored tissue paper
Green pipecleaners (to use as stems)
Scissors
Ruler
Directions:
-Cut tissue paper into rectangles of desired size (the photo above features 5″x7″ rectangles).
-Stack around 15 pieces of tissue paper. Use the same color or different colors. The greater the number of pieces you use, the fuller your resulting flower.
-Accordion pleat the tissue paper working from the long side.
-Wind one end of the pipecleaner around the center of the accordion pleated tissue paper.
-Trim the ends of each side to shape the petals. Try some rounded petals and some pointed; bouquets comprised of both types look beautiful!
-Gently separate each layer pulling upwards toward the middle of the flower. Repeat on the second side.
And voila- in just a few minutes, you have lovely decorations to display or share!
